Thursday, March 29, 2012

Roasted Potatoes-Low Oil

I love roasted veggies. The roasted outsides and mushy insides make me happy and my husband too. I think he could eat potatoes at every meal all day and be happy. He loves them any way but roasted is one of his favorites. The only downfall to the roasted vegetable is that, often, you need to use quite a bit of oil on them so they don’t stick to the pan especially when cooking particularly starchy or sugary veggies like potatoes and sweet potatoes. Recently, our family started to adopt a low oil diet. That isn’t to say we don’t every have oil. We’ve just tried to stop using it as a food group…..I do love my olive oil. Seriously, I could almost eat it by the spoonful. Not the healthiest food choice that way. So, I’ve been trying to find ways to eat some of what we love without all the oil.
Now let me just say that I have literally fallen in love with parchment paper. Nothing sticks to it and things still brown. I’ve started using it a lot. For cookies, for packets of veggies on the grill wrapped in aluminum foil, and for ROASTED VEGETABLES!!!!! It is such a miraculous thing to me, and it makes cleaning up a piece of cake too! Always, always, always a plus for me……
Most of us roast our veggies on some sort of baking sheet. The only issue with using the parchment paper is that is moves around making it rather difficult to use a spatula to flip/stir the vegetables as they cook. One night while prepping dinner I had an idea. I had two baking sheets of the same size, so I cut the parchment paper a few inches (4 or 5 I would guess) larger than the pans. Then I put the parchment the first pan and wrapped the paper underneath the pan and placed that pan inside the second pan which held the paper in place. And Voila! It worked perfectly. I was able to easily use the spatula without the parchment moving. Perfect!
As for the recipe for the potatoes, I’ll do my best. Not a lot of measuring going on and it is a matter of taste. Pick the herbs/spices you like and remember salt.
Here is what I USUALLY put on my Low Oil Roasted Potatoes.
·    Chop up some potatoes and place in a large mixing bowl (1 inch or less cubes work well      and larger or smaller is fine too. You’ll only need to adjust your baking time.)

·    Sprinkle on some salt, pepper, garlic powder-don’t go crazy with this one (you can also use fresh chopped garlic), onion powder and sage.

·    Toss with hands to coat potatoes with spices.
·    Add about 1 tsp or less of olive oil  (per 5-6 medium potatoes) and toss with hands again.

·    Dump potatoes out onto prepared parchment lined pan.

·    Bake at 400 F for about 1 hour. Check them every 15 minutes and turn them with a spatula each time. Remember baking times will vary based on the size of the potatoes and the amount of “roastedness” desired.

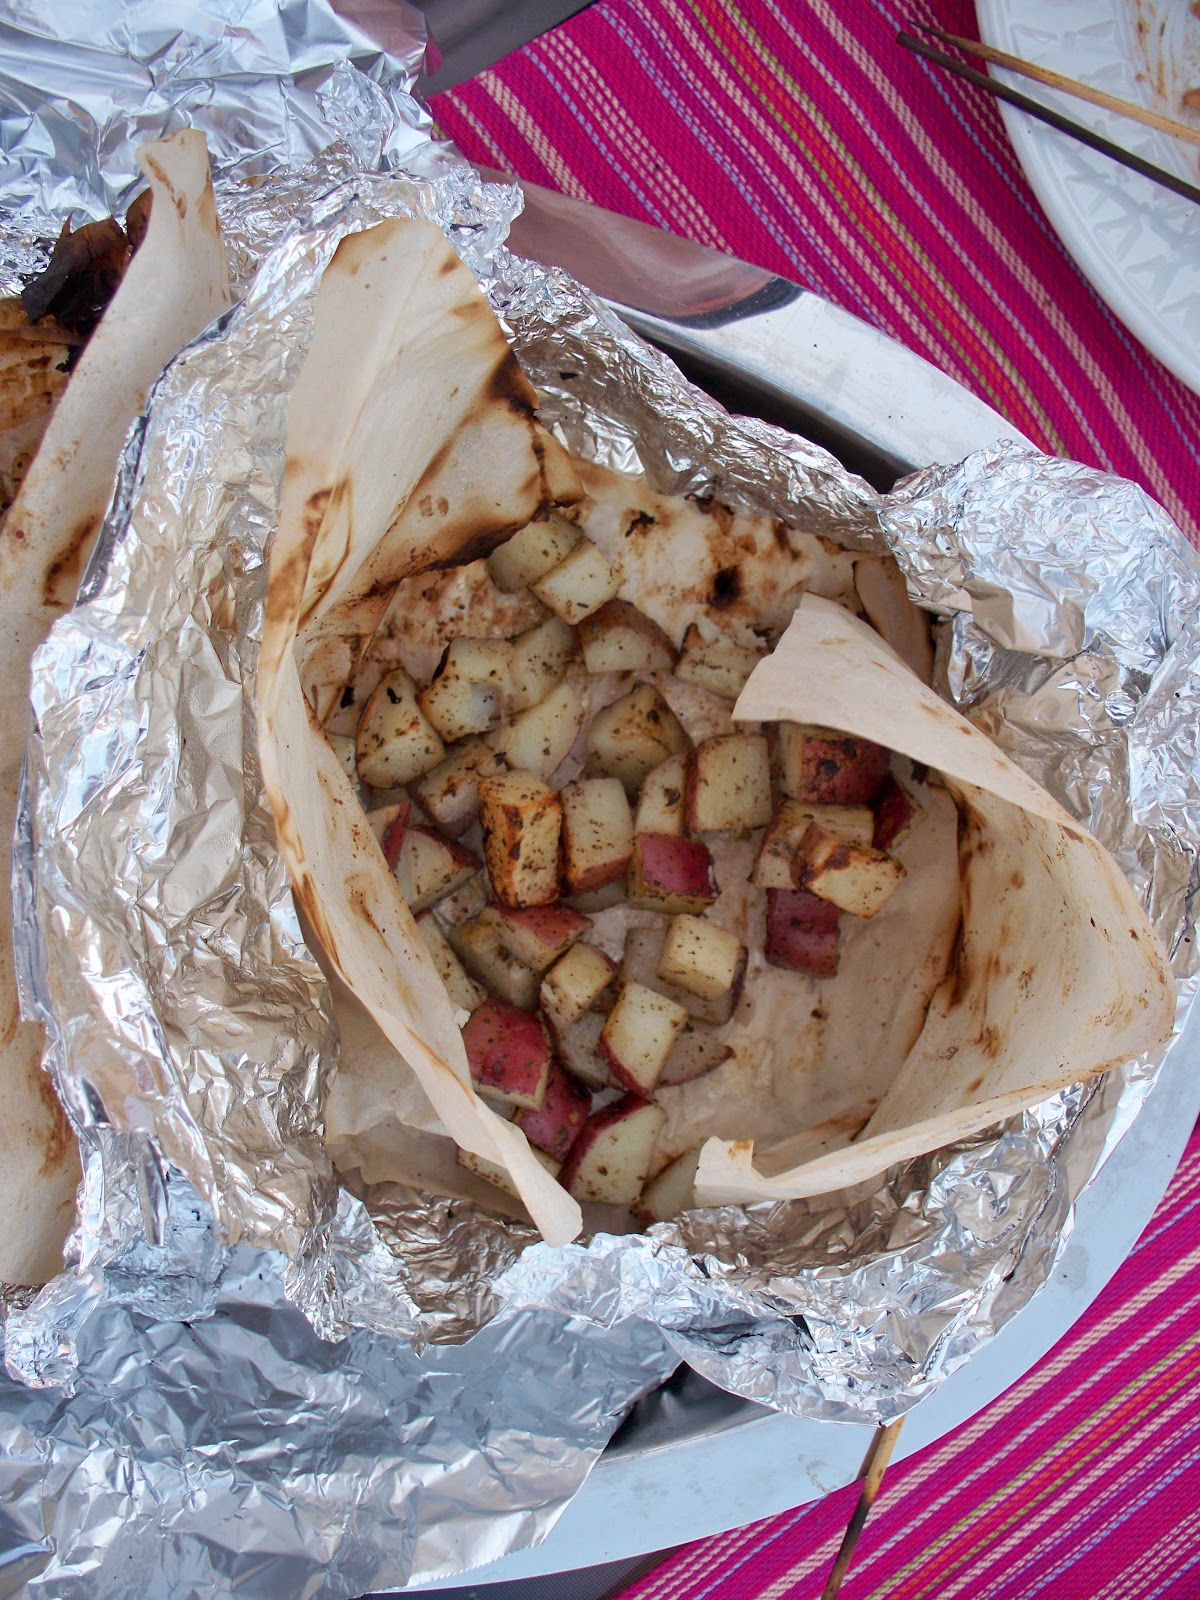
And don’t forget summer is on its way. These same potatoes can be cooked on the grill in about half the time. Simply take a large piece of aluminum foil and line the foil with parchment paper leaving about a 1 1/2 to 2 space between the end of the parchment paper and the foil to allow for folding. Place prepared potatoes on the parchment and fold the parchment over to cover the potatoes (like you were folding over wrapping paper). Then fold over the foil and fold over the edges a few times and crimp tightly. Place on a hot grill for about 20-30 minutes turning once if desired. Open these pockets of yumminess and eat!!!

Saturday, March 24, 2012

Crazy Tweaked Chocolate Chocolate Chip Cookies (vegan, gluten free, oil free, nut and seed free)

Aren’t there times when you just wish someone would say, “Excuse me, but would you like a cup full of cookies?” Mmmm, yes, yes I would…with a cup of coffee please. Ooooo and a nap! (sigh) I like la-la land. Anyway, since that NEVER seems to happen and since fantasies can only be so real….make some for yourself! You totally deserve it!
These cookies are based on my recently created Crazy Tweaked Chocolate Chip Cookies (2/29/2012 post).  These cookies have no oil so there is also very little guilt involved with eating A CUP of cookies. These crazy treats are suitable for most dietary restrictions and they taste fantastic. They are crispy on the outside and kind of like a brownie on the inside. Yeah, they’re terrible.
If you would like a richer chocolate cookie you could use my Chocolate Chocolate Chip Cookie from my first post. And if you want to use traditional flour instead of the gluten free flours just replace the sorghum flour, rice flour and starch with 1 cup of all-purpose flour and omit the xanthan gum.       
So, cheers my friends. I raise my cup of cookies to you!!


*Special thanks today to my 3 year old baking assistant. She runs my mixer (and a lot of my world!). 


Crazy Tweaked Chocolate Chocolate Chip Cookies (Gluten free, vegan, nut/seed/bean free and no oil products)

1/4 c. sorghum flour                                             
1/2 c. plus 2 TBS white or brown rice flour (tweak: replace 2 TBS of rice flour with 2 TBS protein powder of choice)
1/2 c. plus 2 TBS cocoa
1/4 c. potato or arrowroot starch
3/4 c. sugar
1/2 c. brown sugar
1/4 tsp. baking soda
1/2 tsp. baking powder
1/4 tsp. Xanthan Gum
1/2 tsp. salt
1/2 c. rice milk (or other dairy free milk ...tweak: you could use a dairy milk instead if you prefer)
1 tsp. vanilla
1 c. dairy free semi-sweet chocolate chips (like Ghirardelli Semi-Sweet Chocolate Chips or dairy and soy free like Enjoy Life brand semi-sweet chocolate chips)
_________
In a mixer mix the sugars and the rice milk and vanilla. In a separate bowl stir all the other dry ingredients together using a wisk. Add the dry ingredients to the wet and mix well. The batter/dough will be a little looser than traditional chocolate chip cookie dough. It should slowly lose its form when scooped. If it is too stiff add an additional 1-2 TBS of rice milk. Stir in chocolate chips.

Spoon by rounded tablespoons onto the cookie sheet. Make sure you use parchment paper for these cookies because without any fat in the dough they will stick to a plain cookie sheet. You could use a SILPAT silicone baking pad, but I found that the paper worked better.
Bake at 375 F for 12-14 minutes. (I consistently bake them for 13 mins.) Cool slightly on the pan then move to cooling rack. Eat.
*Allow to cool very well before placing in airtight container.

Friday, March 16, 2012

Irish Soda Bread (traditional, gluten free and dairy free options)

Well, St. Patrick’s Day is upon us. It’s time for all things green, leprechaun, or made with Guinness. I thought I’d give you a somewhat traditional Irish treat for the occasion. Now normally I don’t care for soda bread…too much baking soda for my taste buds most of the time. But my son and his class made soda bread this week in school using a recipe from allrecipes.com called Irresistible Irish Soda Bread.  http://allrecipes.com/recipe/irresistible-irish-soda-bread/ He brought home a piece for me to try and it was quite good. So, I thought I’d alter it and see how it came out.
I made it last night and tried it this morning (it is recommended that you eat it the next day or several hours after cooling for best flavor). I really liked the flavor and could see making this as a savory bread or muffin to go with dinner. My son loves it and has already had 3 pieces (so have I)! If you made muffins I would guess the baking time would be around 25 minutes give or take 5 minutes. Also, if you DO prefer a more soda-y soda bread you may want to increase the baking soda to 1 1/4 or 1 1/2 tsp. I chose to use white rice flour instead of my usual brown rice to keep it closer to the white flour used in the original recipe, but feel free to use the brown rice and I probably will next time.
This bread would also be great with select herbs added. Erin go bragh!

Irish Soda Bread (traditional, gluten free and dairy free versions)

3 cups all purpose flour (tweak for gluten free: 1 1/2 c. sorghum flour and 1 3/4 c. plus 2 TBS white rice flour and 1 tsp xanthan gumas you can see I increased the total flour by 6 TBS )
1 TBS baking powder
1/3 c. white sugar (I used organic cane sugar)
1 tsp salt
1 tsp. baking soda (increase by 1/4 tsp -1/2 tsp if you want to taste more of the soda)
1 egg lightly beaten
2 cups buttermilk (tweak for dairy free: 2 c. rice milk less 4 tsp of vinegarmeaning: place 4 tsp of vinegar in a cup then add enough rice milk to equal 2 c.)
1/4 c. melted butter (tweak for dairy free: use grapeseed oil or oil of choiceI think grapeseed has a somewhat buttery flavor)
___________________
Directions:
Preheat oven to 325 F. Grease a 9X5 loaf pan or muffin tins.
Combine all dry ingredients and stir together using a wisk. In a separate bowl beat the egg then add the rest of the wet ingredients together. Pour wet ingredient mixture into the dry ingredients stirring to combine. Pour into prepared pan.
Bake for 60-70 minutes or until a toothpick inserted in the center comes out clean. Cool for about 10-15 min then remove from pan to completely cool on wire rack. Once cooled wrap bread in foil for several hours or overnight for best flavor.

Monday, March 5, 2012

Pure Vanilla Extract: Is it gluten free?

Some people have wondered if they need to purchase “Gluten Free Vanilla” if they are trying to make gluten free products. Here’s the 411. Pure vanilla extract IS gluten free. You don’t need to buy special vanilla. I think the concern was born out of the fact that many grains (like wheat) are used to make the refined alcohols used in things like vanilla extract….. or your favorite martini. However, the distillation process does not allow any of gluten proteins to pass into the final product. So, none of the gluten that may have been used to make the alcohol ends up in the alcohol or the vanilla it is used in. If companies are labeling their pure vanilla extract product as “gluten free” they are likely doing so to get people’s attention and  to become part of a niche market. Much like when many manufacturer started labeling their products “fat free” even though their product had always been fat free and their wasn’t anything new or special about it…..like fat free marshmellows…..makes them SEEM healthier doesn’t it?
Oh, while on the topic of vanilla. Look at other stores for great prices on vanilla. The grocery store prices are ridiculous for the amount of vanilla you get AND many of the major brands include corn syrup. You can get pure vanilla extract (vanilla beans, alcohol and water) at places like The Christmas Tree Shop (about $3.50 for 8oz), Reny’s (in Maine), etc. for far cheaper than the grocery store for an often better product. Also, look in those stores for Bob’s Red Mill flours and products too…..also cheaper than the grocery store!
That’s it for today’s class of Vanilla 101.  Use freely!!!

Wednesday, February 29, 2012

Crazy Tweaked Chocolate Chip Cookies for Everyone!!! (Vegan, Gluten Free, Soy Free, Oil/Margerine Free, Nut/Seed Free and Flaxseed Free)

Wa-Hooooooooo! I just invented the craziest chocolate chip cookie. “Invented a chocolate chip cookie?”, you may ask, “Hasn’t someone already done that?”. Nope, not like this. I am so jazzed I can hardly stand it. Here is how everything started:
A few days ago my sister issued me a challenge. She said, “I need a chocolate chip cookie that doesn’t have any oil/margarine or nuts or nut/seed butters in it, and no flax seed, and vegan, and gluten free. So, if you could work on that….that would be great.” Seriously? You want a Vegan, Gluten Free,  Soy free (That’s for me, might as well throw that in too!), oil/margarine free, Nut/Seed free, and flaxseed free. Luckily she didn’t say sugar free or I’ve got nothin’. I thought, “If I could actually make this recipe nearly everyone could eat it.”
 Hmmmm. My brain started churning. It seemed like you would need some sort of fat. I started thinking maybe avocado. Yes, I’ll run with that at see what happens. So, I started my concoction and other than the fact that the color was a bit weird they seem pretty good. I thought I had won. Nope. Then they cooled. They became dense and pasty. Everything you want in a cookie, right? Chalk up a loss.
I was haunted by my need to conquer this challenge. I hit the drawing board again today. Forget the avocado. I’ll do straight up liquids and dry ingredients and see what happens. I upped the sugar a bit, increased the liquid (rice milk), added some salt and baking powder (the first version only had baking soda) and increased the starch.  As they were baking they LOOKED like chocolate chip cookies. When I took them out they smelled and tasted like chocolate chip cookies. Could it be? Oh my God, I DID IT!!!!!! I am a creative problem solver by nature so this was sooooo excited to me. I hope I can sleep tonight……Yipee!!!!!!!!!!!!!!!!!!!
Oooo, another variation would be to omit the chocolate chips and add about a teaspoon (more if you like) of cinnamon and make them like a Snickerdoodle cookie. Mmmmmm.


Crazy Tweaked Chocolate Chip Cookies for Everyone  - Vegan (no dairy, no egg, no honey), Gluten Free, Soy Free, Oil/Margerine Free, Nut/Seed Free and Flaxseed Free

3/4 c. sorghum flour                                             
3/4 c. white or brown rice flour
1/4 c. potato or arrowroot starch
3/4 c. sugar
1/2 c. brown sugar
1/4 tsp. baking soda
1/2 tsp. baking powder
1/4 tsp. Xanthan Gum
1/2 tsp. salt
1/2 c. rice milk (or other dairy free milk)
1 tsp. vanilla
1 c. dairy free semi-sweet chocolate chips (like Ghirardelli Semi-Sweet Chocolate Chips or dairy and soy free like Enjoy Life brand semi-sweet chocolate chips)
_________
In a mixer mix the sugars and the rice milk and vanilla. In a separate bowl stir all the other dry ingredients together using a wisk. Add the dry ingredients to the wet and mix well. The batter/dough will be a little looser than traditional chocolate chip cookie dough. It should slowly lose its form when scooped. If it is too stiff add an additional 1-2 TBS of rice milk. Stir in chocolate chips.
Spoon by rounded tablespoons onto the cookie sheet. Make sure you use parchment paper for these cookies because without any fat in the dough they will stick to a plan cookie sheet. You could use a SILPAT silicon baking pad, but I found that the paper worked better.
Bake at 375 F for 12-14 minutes. As long as they are not burning…. cooking slightly longer vs. shorter will yield better results. Cool slightly on the pan then move to cooling rack. Eat.
*Allow to cool very well before placing in airtight container.

Friday, February 24, 2012

Cinnamon Muffins with Crunchy Topping (traditional, gluten free, and vegan options)
I came up this recipe while vacationing with my family on Sebago Lake in Maine. We were staying at a friend’s beautiful lake home that they so graciously let us use. The house had a full kitchen and many basic supplies. We had gone to the store to pick up our groceries for meals and my flour supplies for any random pancakes or such that needed to be made. One morning, another “I need a muffin” morning, I wanted to make muffins but realized that I didn’t have any of my normal muffin ingredients with me...no cocoa....no blueberries….no lemons…no chocolate chips. BUT… I did find cinnamon in the house. So my tweaked gluten free cinnamon muffins were born.
These muffins have become a favorite for me. I love them because they are delicious, and I love them because I always have the ingredients I need to make them. (Who doesn’t always have cinnamon lying around?)  They taste like coffee cake and could easily be made in a 9 inch round pan or a 9 inch(ish) spring form pan rather than muffin tins if you prefer. The baking time would likely be about 35-40 min if you choose to do this, oh, and grease the pan.
The crunchy streusel style topping really throws these muffins over the top. And the recipe for the topping below actually makes twice as much as you need…but rather than adjusting the recipe I keep making the extra and just store it in the fridge in a zippered plastic bag. That way I’m ready for round two of cinnamon muffins in a week or so, and the topping is already done. Yum. Yum. Yum.

Cinnamon Muffins with Crunchy Topping (traditional, gluten free and vegan options)

Muffins
2 ¼ c. flour mixture of choice (I use 1 1/8 c. brown rice flour and 1 1/8 c. sorghum flour                            tweak  for traditional : use white or whole wheat flour)
1 1/3 c. sugar
2 tsp ground cinnamon (can use more or less to taste)
2 tsp baking powder
½ tsp xanthan gum
¼ tsp salt
1 c. rice milk product of choice or other dairy free milk (tweak for traditional: use cow’s milk)
2 eggs beaten (tweak for vegan:  use vegan egg replacer or use 2 TBS ground flaxseed plus 5 TBS water wisked together)
½ c. oil ( I like grapeseed)
½ tsp vanilla

Topping (vegan or traditional)
2 TBS softened butter (Tweak for vegan: use regular or soy free non-hydrogenated margarine)
¼ c. brown sugar (packed)
¼ c. brown rice flour (Tweak: for traditional use white or whole wheat flour)

Prepare topping first. Smash ingredients together with a fork until fine crumbles form. Set aside if fridge. Fluff with fork as needed before adding to muffins.
Combine all dry ingredients. Stir with wisk to combine. Combine wet ingredients and wisk together. Add wet mixture to dry mixture and fold together until combined. Spoon into greased or paper lined muffin tins. Top with previously prepared crunchy topping.

Bake 375 F for 20-22 minutes until muffins feel spongy and spring back. Cool in tins for 5-10 minutes then remove if desired.

Friday, February 17, 2012

Gluten Free Tortilla Discovery!

Today I had fully intended to share a delicious cinnamon muffin recipe, but then I went grocery shopping at Hannaford. And while I am not sharing anything I have tweaked, I certainly made a discovery for those tweaking their diets. I just ate one of the best store bought gluten free things I’ve ever had. Not only is it gluten free, it’s corn free (except for possibly some minute trace of corn in the xanthan gum), it’s soy free, it’s potato free and it’s vegan. And it doesn’t taste like cardboard!
Food for Life® (They are the Ezekiel Bread/Cereal people.) is now making a brown rice tortilla. I had never seen it before so maybe it’s new or maybe I’ve just missed it but thought I’d give it a try. I’ve been trying to come up with my own tortilla but have yet to find a combination I love. So, I figured worst case scenario…I’m out $3.69.
When I got home I let the tortillas thaw (they were in the natural section of frozen foods) and pulled one out and warmed it on the stove top over an open flame. Well, I was in a state of shock after the first bite. I fully expected it to be fine but not yummy. Texture wise it is not as supple as a wheat flour tortilla. It definitely has more “chew” but kind of in a good way. The flavor and texture reminded me very strongly of a fine artisan French baguette or bole bread. For those of you with fond memories of bread……you know how those loaves would have a crisp outer crust covered in tiny, superficial crunchy bubbles and the crust and bread together would have this well bronzed flavor and this “chew”. Mmmmmmm. So, for someone like me who hasn’t had bread in 2 years, I was in heaven. And frankly, I could care less if I ever make them into a burrito or sandwich (Oooo, a sandwich!). I am happy just eating them plain right out of the bag.
Mine did crack some while I was eating it…but if it had been filled with rice and beans, etc. that moisture may have prevented some of the brittleness.
(5 minute break…..be right back… need another tortilla)
Okay, so I had to add some sort of tweak as I eat my second tortilla (plain). To warm the 2nd one I quickly ran both sides under tap water and patted dry with a towel. Then over the open flame on my gas stove I heated the tortilla flipping 3 or 4 times at about 3 second intervals and Ta-Da!!!, no more brittle tortilla….still chewy though……still is a good way. The water on the outside is essentially steaming the tortilla. You could also use a very warm pan on the stove top too, but the tortilla will need a bit more time to warm. You could also try warming them either over a pot of boiling water with a cooling rack on top or by placing them in a slightly dampened tea towel and then wrapping them in foil to warm in the oven.
Sorry for no recipe today, but I HAD to share this with you. I hope find them as good I do.
Coming soon......Cinnamon Muffins!!!!